How to earn more in IT? If a lot of people want to cooperate with you and use your services, your salary increases. How do you make it happen? You can stand out from the crowd by having a website, blog, vlog, YouTube channel or podcast. Today I wanted to show you 2 ways to easily run a static website in AWS. I am writing about 2 ways because people often confuse them, mix them up and then something doesn’t work.
If you like Azure Cloud more, then don’t worry. In the article I wrote some time ago, you will find a description of how to create a static website in the Azure cloud.
Creating your own website can be the first step to higher earnings. Your own website provides many possibilities. You can also present your own achievements or sell your products. If you are good at what you do, it is worth sharing it with others, writing a guide, book, preparing a course or your own application. People really want to pay for specific knowledge that can help them.
If you want to get the job of your dreams, having your place on the web makes you stand out from the crowd. Think about it. You did not say a word and you are already making a positive impression because you want to develop yourself and share your knowledge.
Regardless of the cloud in which you want to create a static website, it is best to buy a nice domain to start with. I will leave SEO issues alone, because I am not a specialist in this field. A little advice from my side, it’s good that in the name of the domain you are buying, there are keywords related to the field in which you will create your website / blog.
I will show the creation of a static website on the example of the “poradnikadmina.pl”.
MeetUp SysOpsDevOps Polska
If you prefer video over reading, I have great news. I showed up live at a meetup organized by SysOpsDevOps Polska. You can watch the speech on YouTube by clicking on the link below. There is one thing, the video is in Polish and I don’t know if there will be subtitles in English.
Why S3?
It is easy to use, it can be mapped as a regular network drive and we can store data there in probably any format. Our static page will be able to contain, for example, html, css files, pictures, videos, javaScript and many others.
S3 – Amazon Simple Storage Service costs little, we only pay for the space what we use and the traffic to our site. Amazon also provides high security, scalability and high availability of 99.99%. We grant access to data and their edition using appropriate permissions and policies.
Method # 1 – S3 Website endpoint (Static website hosting)
Below is the first way to get a Static Website on AWS. It is simple, it uses the S3 Website endpoint, but unfortunately also offers less configuration options. This way you can quickly create a simple website at no extra cost.
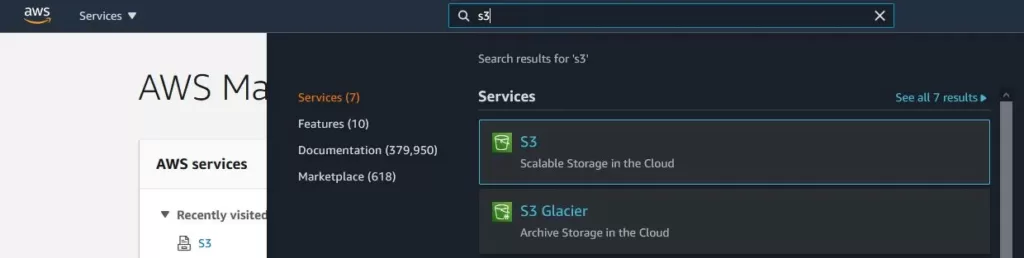
1) S3 bucket – Create
First, you will need to create an S3 bucket on the AWS platform. The name of the bucket must be unique as usual. Ideally, it should be the same as the domain name. In my case, it will be poradnikadmina.pl.
When you create a bucket, you can add a regular html file to it, like the one below:
<!doctype html>
<html>
<head>
<title>tytuł strony</title>
<meta charset="UTF-8">
</head>
<body>
<h1>Tytuł stopnia pierwszego</h1>
<h2>Tytuł stopnia drugiego</h2>
<h3>Tytuł stopnia trzeciego</h3>
<h4>Tytuł stopnia czwartego</h4>
<h5>Tytuł stopnia piątego</h5>
<h6>Tytuł stopnia szóstego</h6
<p>To jest treść pierwszego akapitu</p>
To jest pierwszy wiersz<br>
To jest drugi wiersz<br>
To jest trzeci wiersz<br>
To jest czwarty wiersz<br>
<p>To jest treść drugiego akapitu</p>
<p>To jest LISTA:</p>
<ul>
<li>punkt numer 1</li>
<li>punkt numer 2</li>
<li>punkt numer 3</li>
</ul>
<span style="color: red">Ten tekst został napisany czcionką koloru czerwonego</span>
<span style="color: green">Ten tekst został napisany czcionką koloru zielonego</span>
</body>
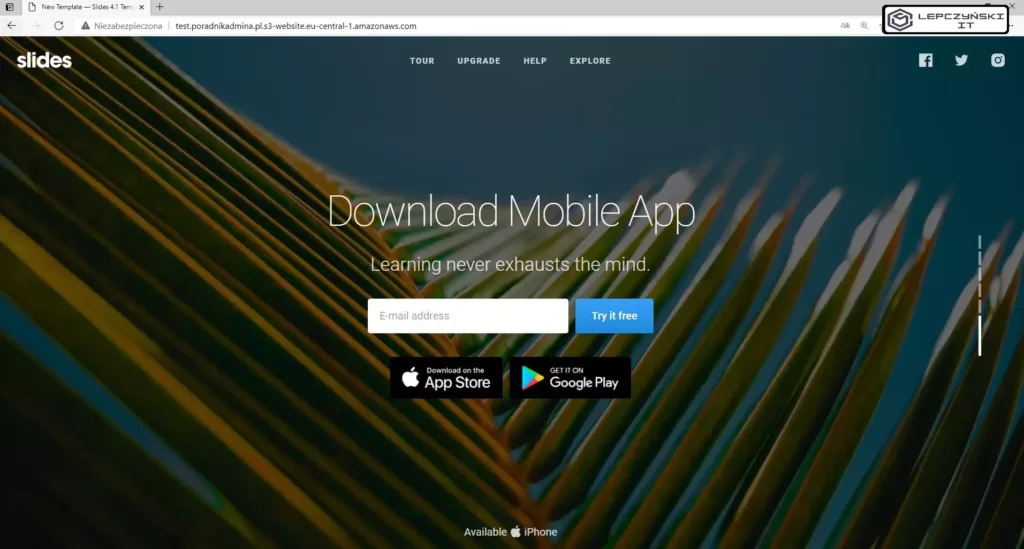
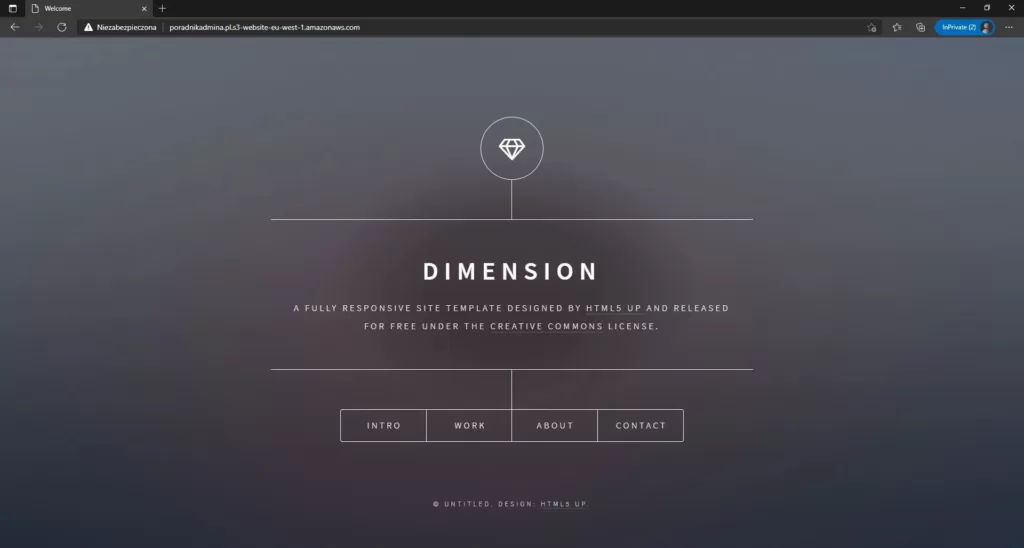
</html>I recommend that you try a little more and look for a nice template, it can be free so your website doesn’t have to look like this:

If you look for a little bit of cool static templates then your website can look much better without a lot of effort. Below you will find 2 examples:
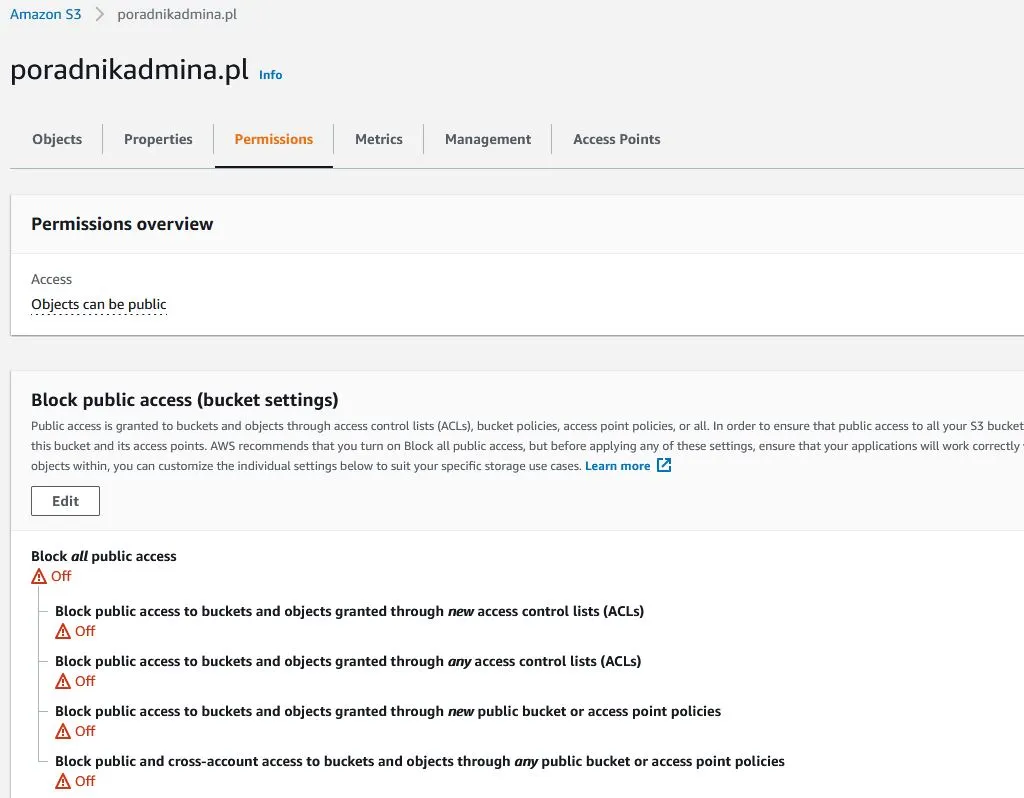
2) S3 bucket – Permissions
When you create an S3 bucket and add content to it, go to the Permissions tab and disable blocking public access. Click edit and uncheck all checkboxes.
To make the files available to everyone, add an appropriate policy. In the “Bucket policy” section enter:
{
    "Version": "2012-10-17",
    "Statement": [
        {
            "Sid": "AllowReads3bucket",
            "Effect": "Allow",
            "Principal": "*",
            "Action": "s3:GetObject",
            "Resource": "arn:aws:s3:::poradnikadmina.pl/*"
        }
    ]
}
The policy called “AllowReads3bucket” allows “Allow” to anyone “*” to read “s3: GetObject” of the entire contents of the bucket. Of course, replace the “poradnikadmina.pl” for the name of your bucket.
3) S3 bucket – Properties
Now go to the “Properties” tab and configure the website settings.
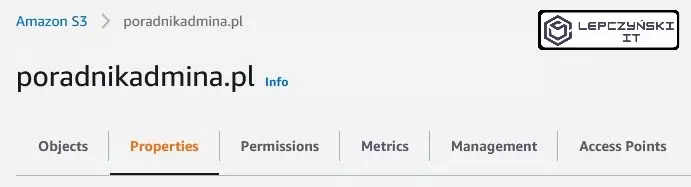
Go down to the Static website hosting section. After clicking Edit, you will be able to turn on Static website hosting and start using Amazon S3 to host your website. There aren’t many options here. Enter the name of the file from your website that will be displayed by default. You don’t have to, but you can also provide the name of the file that will be displayed when errors are encountered on your website.
When you save, you will see the url where your website is available. If you did everything correctly, you should see your website at this address 🙂

4) Domain – redirect to S3
The website works, there is only one but. The website address created by the Amazon Static website hosting looks unattractive. If you have already purchased a domain, it is worth setting it to point to a static website hosted on AWS S3. You can do this directly by pointing to the url of your S3 bucket.
Log in to the place where you purchased the domain and set up redirection. In most cases it is enough to set CNAME redirection from domain_name.com to the url address given in S3. In my case, the DNS entry looks like this:

Theoretically, propagation may take up to 24 hours for regional domains (.pl) and 72h for global domains (.com). In practice, the redirection usually starts working after several minutes.
If you have set up the redirection correctly, the page will be available directly at the address created in S3 http://poradnikadmina.pl.s3-website.eu-central-1.amazonaws.com, and also at the new http://poradnikadmina.pl, which we just redirected to S3. One step more, but it looks so much better.
5) SSL
If you look closely, you will notice that the site is unsecured. We can only connect to it via HTTP, not HTTPS.
Now you have 2 options:
- Do nothing and stay with an unsecured website on http.
- Create a free certificate in ACM (AWS Certificate Manager) for the domain and connect it to CloudFront (paid CDN). In CloudFront you also need to connect the S3 bucket. Finally, change the DNS redirection for the domain from S3 to CloudFront.
I do not recommend option 1 if you want the website to be your showcase, but it can sometimes be useful in other projects. I will describe option 2 in a moment, but first I will tell you what the CDN is and what it is for.
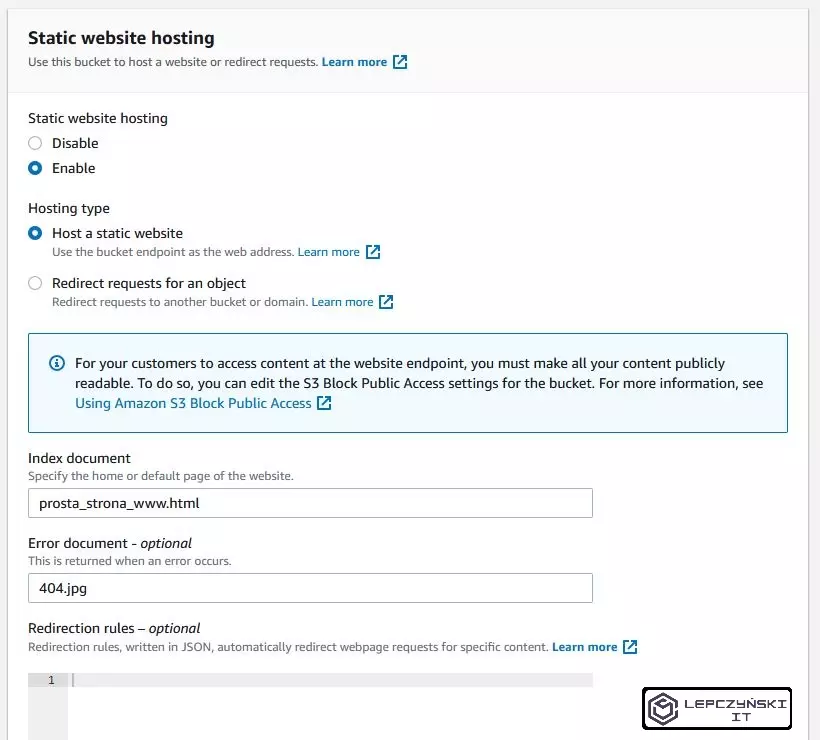
CDN (Content Delivery Network)
CDN – Content Delivery Network is a distributed system of content delivery to many data centers. Simplifying It can be said that these are servers in various places in the world that collect data from the source and pass it on to end users. So, for example, the user who browses the website does not connect to the main server, but to the one closest to him.

As a result, the page loads faster. The main server is no longer the bottleneck to which thousands of people connect, it is more resistant to DDoS attacks. A user who wants to enter a website is actually visiting a copy provided by one of the computers connected to the CDN.
6) CloudFront
As you already know what a CDN is and what it is for, we can move on to practice. Run AWS CloudFront CDN and click Create Distribution.

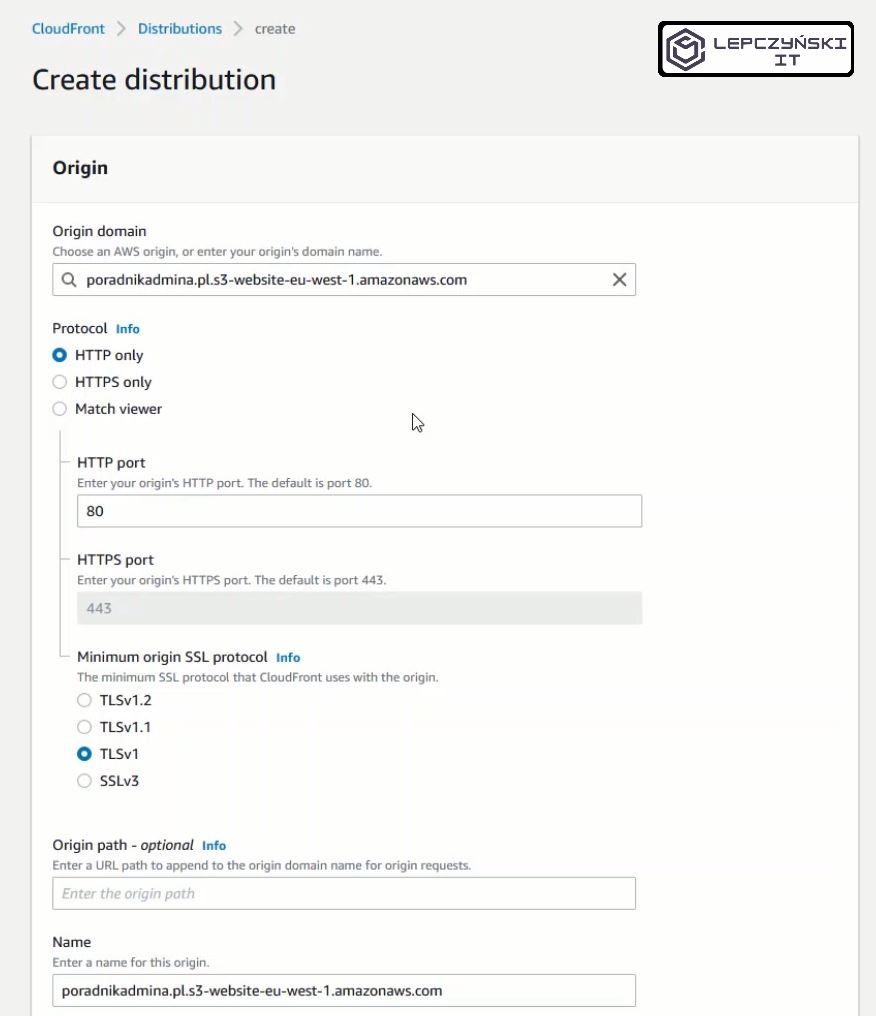
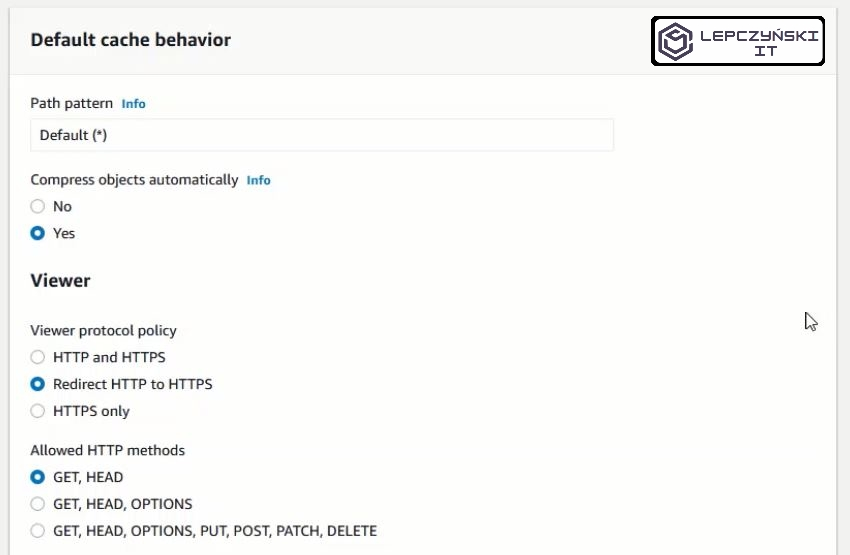
In Origin Domain Name, enter the endpoint from which CloudFront is to download data. Here, enter the address previously generated by AWS S3 static website, omit the http: // prefix only. The Origin ID name will complete itself. It is a good idea to select Redirect HTTP to HTTPS option. This way, all traffic will be automatically redirected to HTTPS. Even if someone makes a mistake and tries to enter via HTTP, they will be redirected to HTTPS.
Since you have bought a domain, check the Custom SSL Certificate (example.com) option and use ACM to create a new certificate. After clicking ‘Request or Import a Certificate with ACM’ a new tab will open.

Enter your domain name. I used poradnikadmina.pl, then click Next. Choose a verification method. AWS will check if this domain belongs to you. I choose DNS and move on. Finally confirm and you will be asked to add a new redirect on the DNS server. After AWS confirms that you are the domain owner (usually it takes some time) the certificate status will change from Pending validation to Issued. Then it will be available on the list of certificates to choose from.

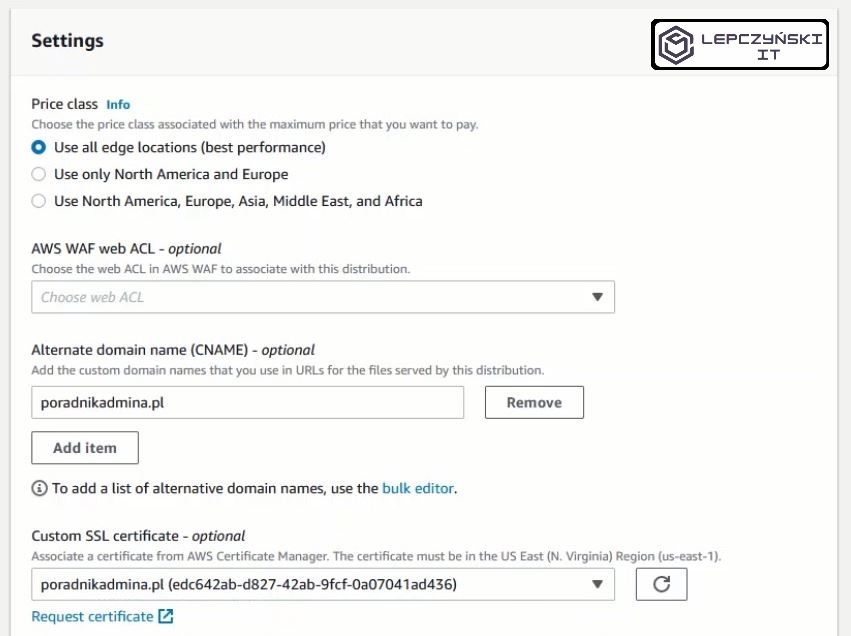
When the status changes to Issued, you can go to CloudFront configuration and select a free certificate from the list. In Alternate Domain Names, add the domain name that will redirect to CloudFront. In my case it is poradnikadmina.pl. When you are done click Create Distribution. On the CloudFront homepage you will probably see that it is in In Progress state.
During this time, you can go to the DNS server where you have purchased the domain and change the redirection. In the beginning, we set the domain to point directly to S3. Now change this redirect to the CloudFronta url. In my case, I create a CNAME redirect from the poradnikadmina.pl domain to the CloudFront address d37qw17dokfl8g.cloudfront.net.

This is the end. If you did everything right, your website will open correctly with https. You will learn more about CloudFront configuration from the second way.
Method # 2 – S3 API endpoint and CloudFront
By using the S3 API endpoint you have much more options to configure your website. You can use a policy that allows the page to be read only through CloudFront. By using this method, you don’t need to allow anonymous users to access your S3.
1) S3 bucket – Create
The process of creating bucket S3 is exactly the same as in the first case. After creating the bucket, add the website files to it in the same way. And that’s where the similarities end.
2) S3 bucket – Permissions
In this case, you don’t need to share files with everyone. You can have a little more control. If not necessary, I block public access to AWS S3 all the time.

In the “Bucket policy” section you can add permissions for CloudFront, but I will save myself the work and let AWS do it. When configuring CloudFront, you will have the option of AWS to set everything up for you.
3) Cloudfront
We run Cloudfront CDN and click Create Distribution.
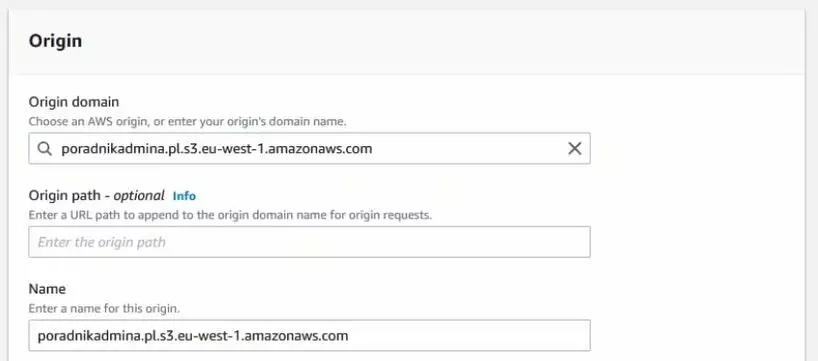
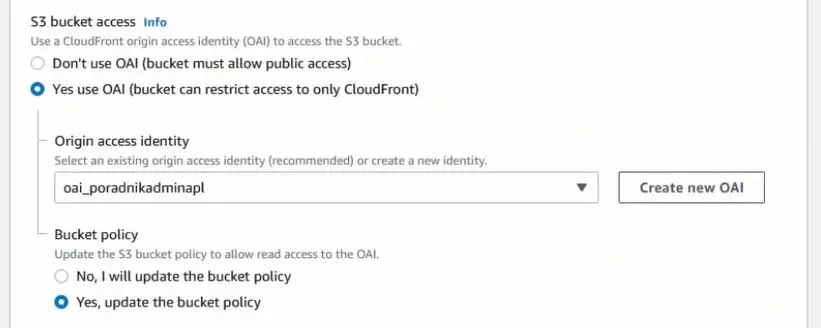
In Origin Domain Name, enter the endpoint from which Cloudfront should download data. Enter the name of s3 here (select it from the list). In the first example we used the address generated by the static website, here we use a different endpoint. The Origin ID name will complete itself. I recommend enabling Restrict Bucket Access and selecting Create a New Identity. An identity will be automatically created that will allow CloudFront access to S3. Be sure to select ‘Yes, Update Bucket Policy’. AWS will then automatically create a policy in S3. It is a good idea to select the Redirect HTTP to HTTPS option. This way, all traffic will be automatically redirected to HTTPS. Even if someone makes a mistake and tries to enter via HTTP, they will be redirected to HTTPS.
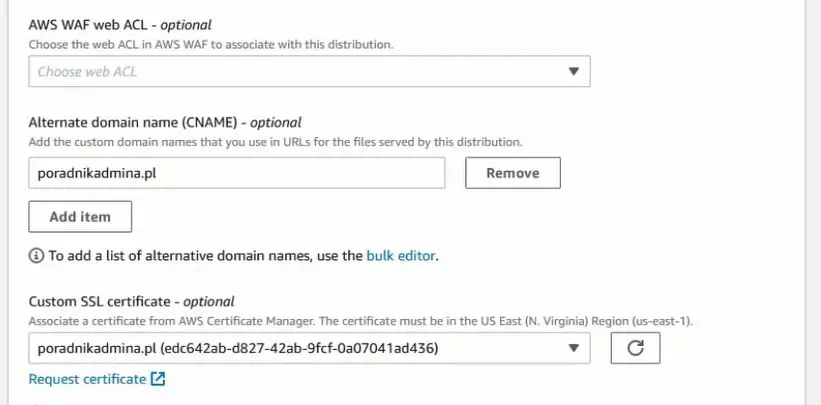
Now, because you are using a purchased domain name, select the Custom SSL Certificate (example.com) option and select a certificate from the list, or create a new one using ACM. After clicking Request or Import a Certificate with ACM a new tab will open.
Enter your domain name. I used poradnikadmina.pl, then click Next. Choose a verification method. AWS will check if this domain belongs to you. I choose DNS and move on. Finally confirm and you will be asked to add a new redirect on the DNS server. After AWS confirms that you are the domain owner (usually it takes some time) the certificate status will change from Pending validation to Issued. Then it will be available on the list of certificates to choose from.
When the status changes to Issued, you can go to CloudFront configuration and select a free certificate from the list. In Alternate Domain Names, you should also add an address that will redirect to CloudFront.
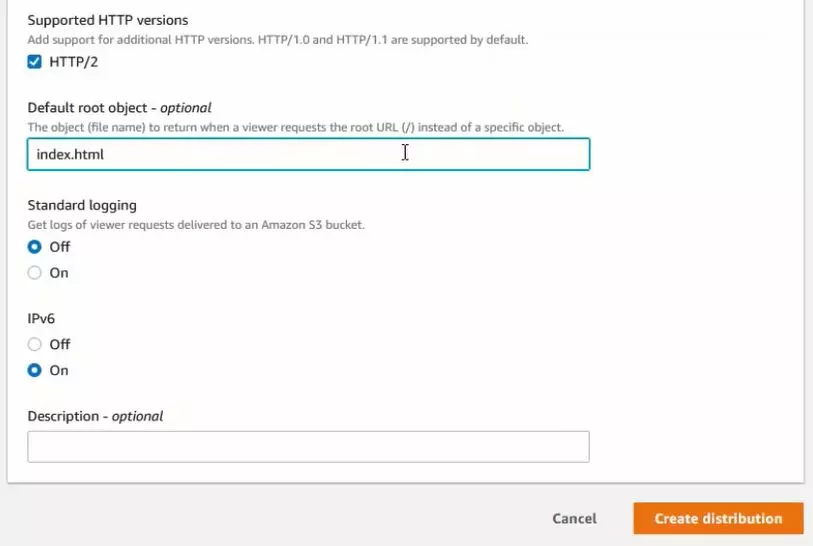
Remember to include the name of your main website file in the Default Root Object. In my case it is index.html. The rest of the settings can be made default. Click Create Distribution when you are done. On the CloudFront homepage you will probably see that it is in In Progress state.
During this time, you can go to the DNS server where you have purchased your domain and redirect it to CloudFront. In my case, I create a CNAME redirect from the poradnikadmina.pl domain to the CloudFront d37qw17dokfl8g.cloudfront.net.
4) Errors
If all went well, that’s great. You should see a static website hosted on S3 under your domain name. S3 will block public access and the site will only be accessible via CND after https.
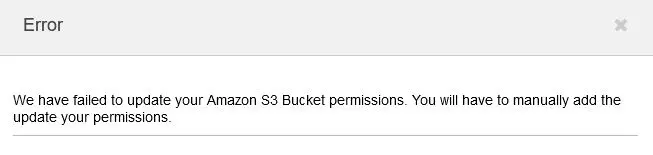
Unfortunately, it is not always so good, sometimes something breaks down. During one of the tests, AWS got lost and was unable to properly create a policy for S3.
In this case, you must add the policy manually. Open S3 and add a policy that allows CloudFront to access S3. You can follow mine, just remember to change the name of the bucket and the CloudFront ID.
{
    "Version": "2012-10-17",
    "Statement": [
        {
            "Sid": "AllowReads3bucket",
            "Effect": "Allow",
            "Principal": {
                "AWS": "arn:aws:iam::cloudfront:user/CloudFront Origin Access Identity E1XGCP5MAMC0E3"
            },
            "Action": "s3:GetObject",
            "Resource": "arn:aws:s3:::poradnikadmina.pl/*"
        }
    ]
}
The policy called “AllowReads3bucket” allows the “Allow” identity of CloudFron with the ID “E1XGCP5MAMC0E3” to read “s3: GetObject” of the entire content of the bucket “poradnikadmina.pl/*”.
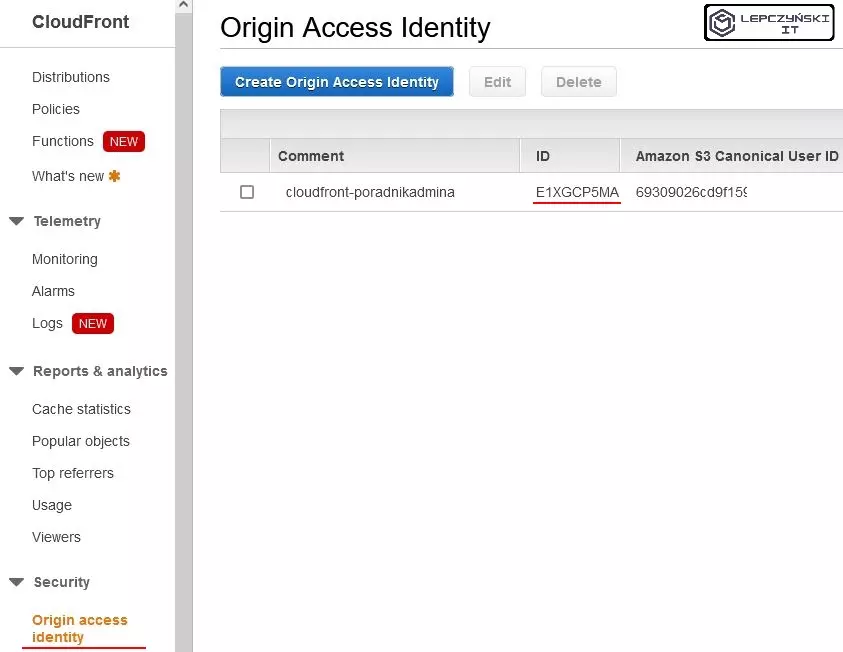
You can find the ID from your CloudFront in the Security section of Origin access identitty. If you didn’t select a dedicated identity when creating CloudFront, you can always create one manually with Create Origin Access Identity.
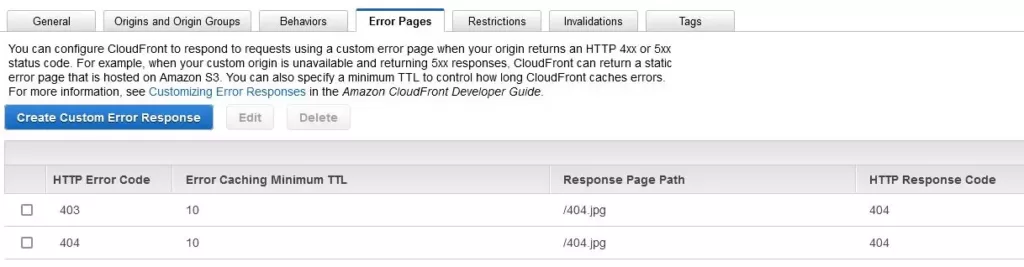
It is also a good idea to define the page that will be displayed when errors occur. We can easily define it in CloudFront. I added a 404.jpg file that will be displayed every time a 403 or 404 error occurs. Moreover, the 403 error will return the 404 code.
Thanks to this, your website will not look like this:
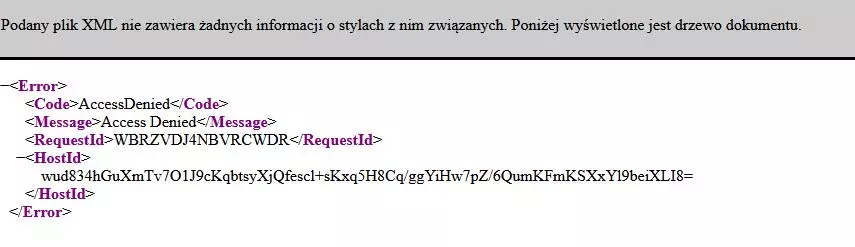
It can return 403 and 404 errors in a much more friendly form, such as:

It’s all. After reading this article, you should know 2 ways to create a static website in AWS. You will know which method when to use. In addition, you also learned what the CDN is for and why you should use it.
You can find documentation for Amazon CloudFront at this link.
If you would like to find out how you can replace CDN CloudFront with something cheaper, then stay tuned to my blog. An article about an alternative to CloudFront will be published soon. A lot of people use it without paying a single dollar. Thanks to this, they have a free CDN and access via https.