
Hi, a good example of making things easier is using ARM (Azure Resource Manager) templates. ARM template make it possible to create the entire infrastructure on the Azure platform in an easy and fast way. We avoid typos and errors, and gain repeatability when we create the same resources for different environments. Each environment can have the same resources, with a different configuration depending on his type.
ARM Template is actually a Java Script Object Notation (JSON) file.
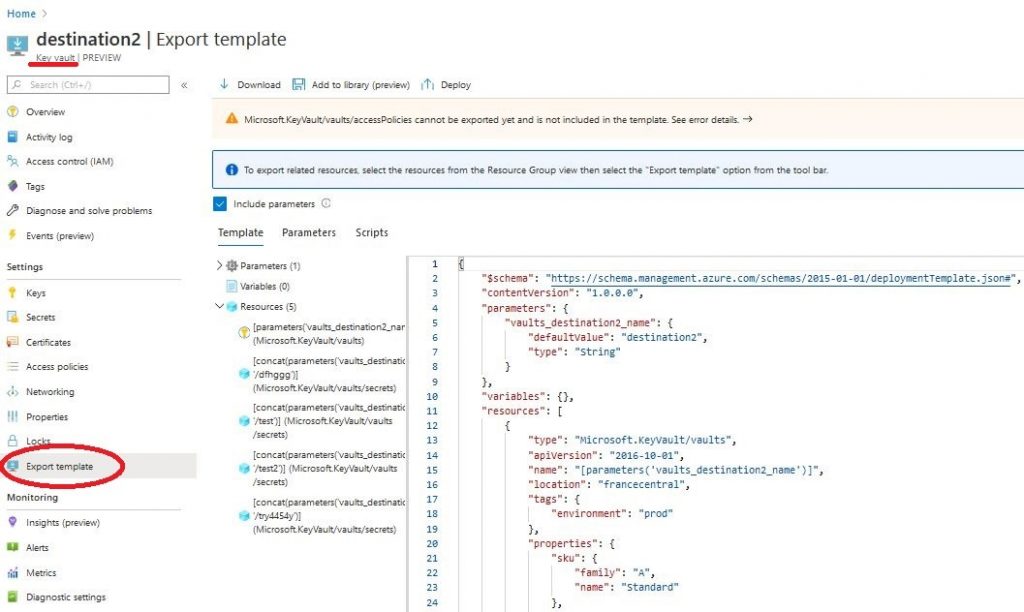
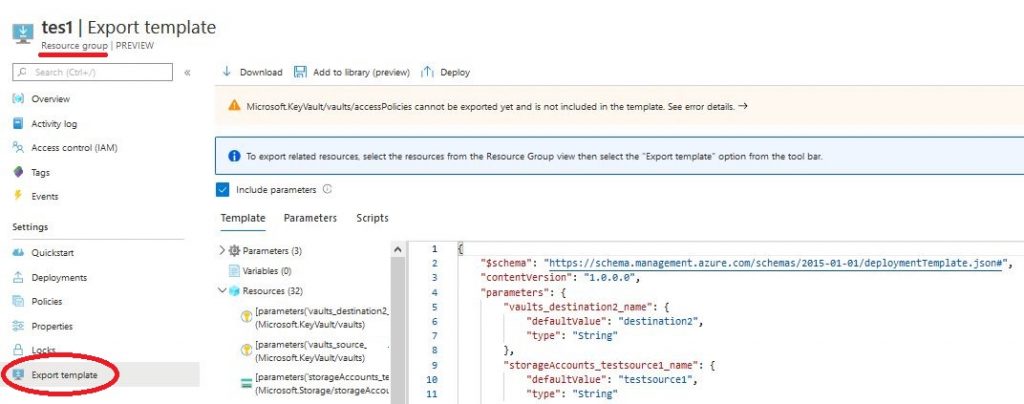
We can write templates entirely ourselves, but an easier way is to generate them on the basis of already created resources or groups of resources. Each resource has its own template, you can see it by clicking on the “Export template” in the settings. We will find the same option next to the resource group, only then we will have a template containing all resources from the group.
We can also download ARM Template from various places, for example from GitHub, but here we need to carefully analyze the code so that we don’t fall victim to a hacker or pay a “bag of money” for resources.
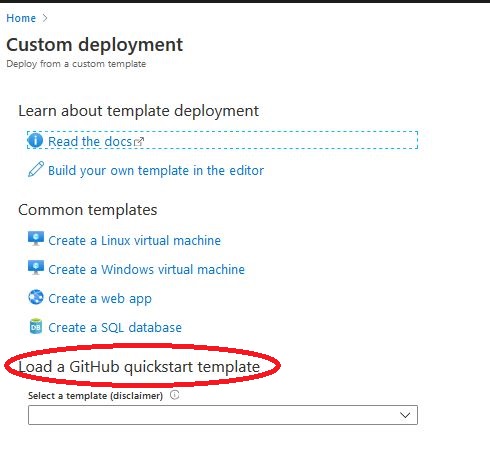
Our portal.azure.com itself allows us to quickly use a template from GitHub.
What does an ARM Template file look like?
I personally like to use Visual Studio Code to edit templates, but not only. For me, it’s a great tool for work, and it’s free.
The template file consists of 6 main blocks: schema, contentVersion, parameters, variables, resources, and outputs. We are most interested in 3 of them.
Parameters – we save in it parameters that must be provided by the user who uses the template.
Variables – Not required, but it’s good to use them to reduce the number of user-supplied parameters. The second reason why you should use them is because the variables defined here can be referenced throughout the template and used many times. Thanks to this, if we want to change them, we change them here, instead of looking for the entire template.
Resources – here we enter what resources we create and their configuration.
How to make your work easier?
Parameters:
As parameters, we can give the user a list, with a default parameter selected, so that he does not have to guess what to enter. We can, as in the example below, provide only specific locations that can be selected from the list. Only in these locations and no others will resources be created so that someone would not mistakenly create westUS instead of westeurope.
        "location": {
            "defaultValue": "francecentral",
            "allowedValues": [
                "francecentral",
                "westeurope"
            ],
            "type": "String",
            "metadata": {
                "description": "Choose a location"
            }
        },
We can give the minimum and maximum values that can be used, for example, so that the disk size is no more than 120GB and the default is set to the minimum value of 30GB:
        "clusterVM_diskSize": {
            "type": "int",
            "defaultValue": 30,
            "minValue":30,
            "maxValue":120,
            "metadata": {
                "description": "Disk size for VM."
            }
        },
We can allow the user creating the resource to enter any value and only suggest a default value, as in the example below.
        "clusterVM_Size": {
            "type": "string",
             "defaultValue": "Standard_B2s",
             "metadata": {
                "description": "Enter the size of the VM."
            }
        },
It may be a good idea to use small, medium, large for the selection list parameters. For example, this list may indicate the size of the environment to be created. The person using the template does not need to be familiar with the parameters of the machines they want to use, but usually knows whether they want to build a small, medium or large environment. The user implementing the template chooses only between a small, medium and large environment. Size of the machines is defined in variables and assigned to a specific environment size:
"EnvSize": {
"type": "string",
"defaultValue": "medium",
"allowedValues": [ "small", "medium", "large" ],
"metadata": { "description": "Choose small for testing, medium for normal operation, and large if you need more frame" } }
...

"VM-Size-list":{
"small":{ "VMSize": "Standard_D2s_v2", "maxScale": 1 },
"medium":{ "VMSize": "Standard_D2s_v2", "maxScale": 2 },
"large":{ "VMSize": "Standard_D8s_v2", "maxScale": 2 }
}
...

"vmSize": "[variables('VM-Size-list')[parameters('EnvSize')].VMSize]" } Variables:
It is recommended to move parameters that do not need to be defined to the variables section. So that the user only has to define the most important parameters and the rest are set.
    "variables": {
        "storageAccounts-accessTier":"Hot",
        "storageAccounts-kind":"StorageV2",
        "storageAccounts-SKU":"Standard",
        "storageAccounts-replication":"Standard_LRS"
    },
Another great advice is to use unique names for your resources. To make your life easier, they can be generated automatically. Can be based on other names such as ‘resource group’ or ‘location’ names. Thanks to this, we have much less parameters to define. When implementing resources in different locations or groups of resources, we will always get different names.
"suffix": "[uniqueString(resourceGroup().id, resourceGroup().location)]" We can also generate variables based on parameters given by the user. A good example to keep names continuous is to replace user-supplied parameters with lowercase letters, or append endings to different resource names. The virtual network can have the same name as the resource group, only the automatically appended ‘-vnet’ suffix. Thanks to this, when creating, we have to introduce much less names, and most importantly. Nomenclature becomes standardized and more readable. Sometimes the length of names may be longer than Azure allows, so you should limit it to 24 characters.
"RGName": "[toLower(resourceGroup().name)]",

"VirtualNetworkName": "[concat(variables('RGName'), '-vnet')]",

"NetworkInterfaceName": "[toLower(concat(variables('VMName'),'-nic-', variables('suffix')))]",

"NSGName": "[substring(toLower(concat(variables('RGName'), '-nsg-', variables('suffix'))), 0, 24)]", Resources:
In the example below, I showed how to use parameters and variables. It is very simple. In the first case, we use square brackets with the word parameters and the name of the parameter. In the second case, we use square brackets with the word variables and the variable name.
    "resources": [
        {
            "type": "Microsoft.Storage/storageAccounts",
            "apiVersion": "2019-06-01",
            "name": "[parameters('storageAccounts_name')]",
            "location": "[parameters('location')]",
            "tags": {
                "environment": "[parameters('environment')]"
            },
            "sku": {
                "name": "[variables('storageAccounts-replication')]",
                "tier": "[variables('storageAccounts-SKU')]"
            },
            "kind": "[variables('storageAccounts-kind')]",
            "properties": {
                "largeFileSharesState": "Disabled",
                "networkAcls": {
                    "bypass": "AzureServices",
                    "virtualNetworkRules": [],
                    "ipRules": [],
                    "defaultAction": "Allow"
                },
                "supportsHttpsTrafficOnly": true,
                "encryption": {
                    "services": {
                        "file": {
                            "keyType": "Account",
                            "enabled": true
                        },
                        "blob": {
                            "keyType": "Account",
                            "enabled": true
                        }
                    },
                    "keySource": "Microsoft.Storage"
                },
                "accessTier": "[variables('storageAccounts-accessTier')]"
            }
        },
We will want some resources dependent on others to be created only after the main resource is created. For example, we will only want to create a ‘blob service’, when we have already created the ‘storage account’. For this we use the “dependsOn” parameter as in the example below:
            "type": "Microsoft.Storage/storageAccounts/blobServices",
            "apiVersion": "2019-06-01",
            "name": "[concat(parameters('storageAccounts_name'), '/default')]",
            "dependsOn": [
                "[resourceId('Microsoft.Storage/storageAccounts', parameters('storageAccounts_name'))]"
            ],
...
If we use templates from existing resources, we can clean them up a bit to make the code more readable. We can safely remove all sections from comments, provisioning state, unique identifier:
//Comments Microsoft.Web/serverfarms --
...

"provisioningState": "Succeeded",
"provisioningState": "Default",
...

"uniqueIdentifier": "37573464-45445436-365554654-356436346678"
One more good tip at the end is validating the template. It’s best to do this after every change we make. We can easily do this with the command:
az group deployment validate --resource-group NAZWA_RG --template-file .\template.json --parameters .\parameters.json On the microsoft website you will find full documentation about the ARM Template https://docs.microsoft.com/en-us/azure/azure-resource-manager/templates/overview
If you are interested in this article, check out the others on Microsoft Azure category https://lepczynski.it/en/category/azure_en/