Hello, this is the first article from AWS (Amazon Web Services) but there will definitely be more. In this article you will learn step by step what you need to do to be able to use the ‘Session Manager‘. The documentation that I found on the AWS website was hardly readable for me and scattered in several places. When I was able to launch the Session Manager service in AWS, I decided to gather all the knowledge together and write down what needs to be done from beginning to end.
What is Session Manager?
Session Manager is a feature on AWS that allows you to connect to your machines without opening ports. On Linux machines, we can execute commands in the console via the browser, let me emphasize this again without opening any ports, even ssh.
The connection can be safer if we create a key in AWS and we will encrypt it. Logs from such a connection can be directly saved to S3 or Cloud Watch and can also be encrypted.
Due to the fact that the console opens in the browser, we do not need any additional tools. More importantly, it can be run on any Windows, Linux or macOS hardware.
Thanks to IAM, we can easily and transparently decide which users / groups have access to the machine.
Connection encryption
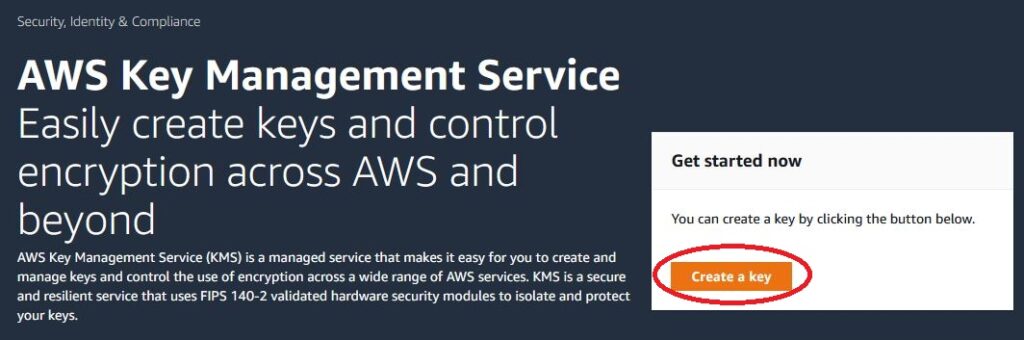
To begin with, we will add a key to the KMS, which will be used to encrypt the connection for currently using TLS 1.2. If you do not want to encrypt your connection, or if you already have a key created, you can skip this section, although I highly recommend that you create a new dedicated key only for this purpose.
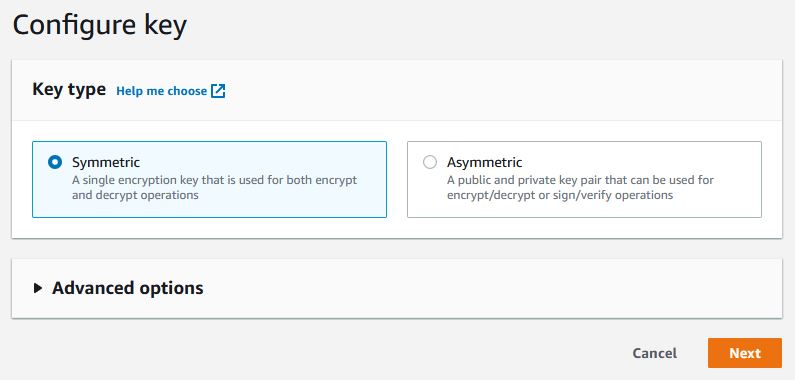
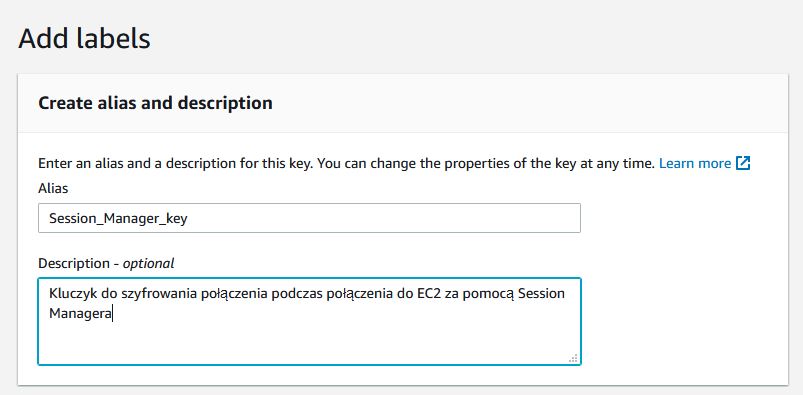
Click on ‘Create key‘, choose symmetrical, then give the name and I recommend entering the description without special characters.
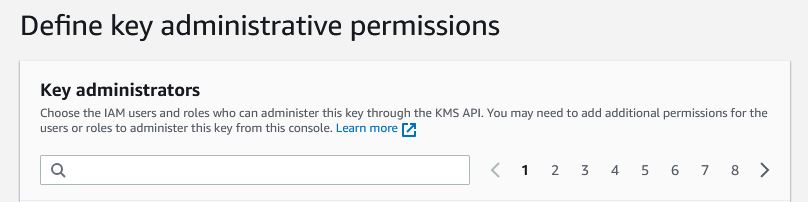
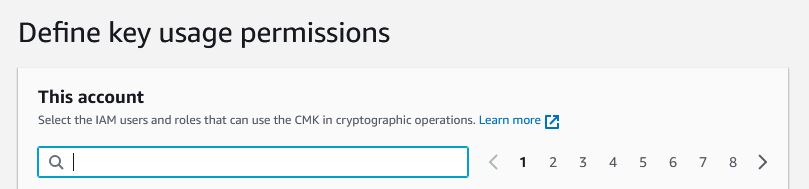
Now we choose the people who will be able to manage the key and delete it, if only we select the checkbox at the bottom. In the next window we will select people who will be able to use the key, I recommend that you do not enter anything in it. The last window will display a policy in which we do not need to change anything. We approve on Finish and the key will be created.
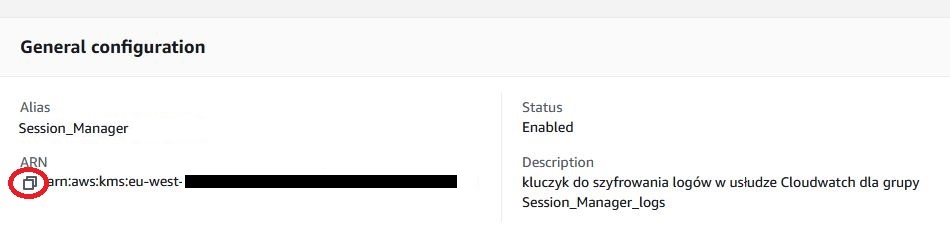
When the key is ready, open it and copy the ARN name, which we will need soon.
Create Policy
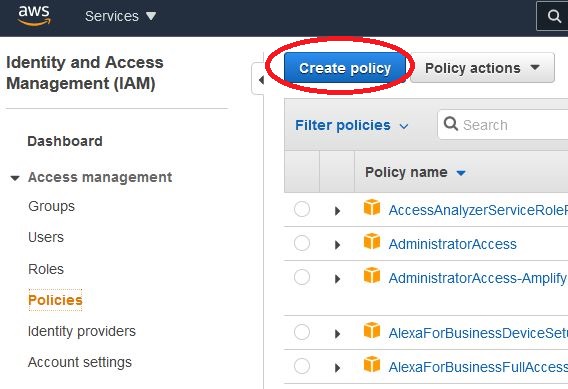
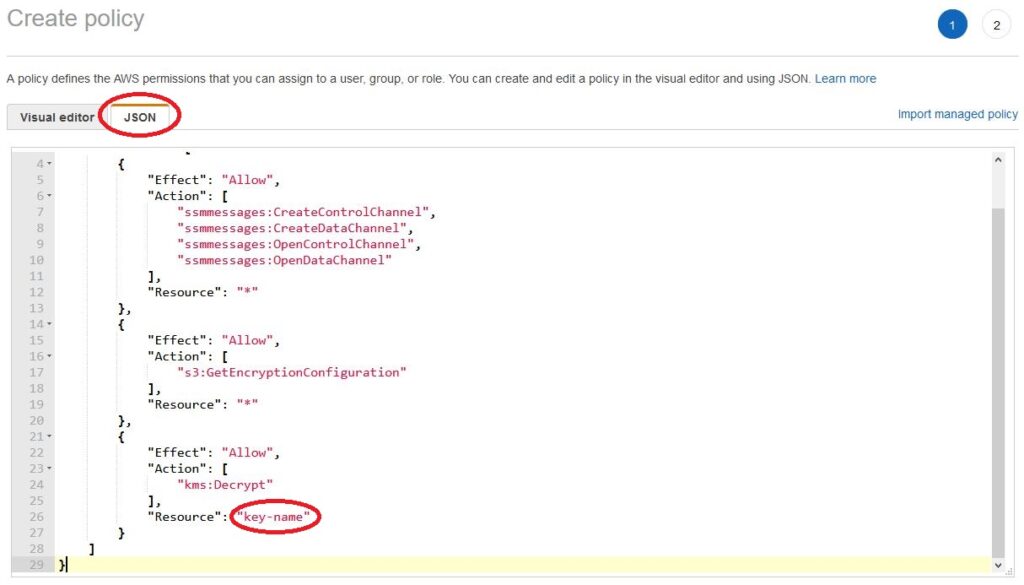
We open the IAM and create a new policy. We choose the JSON tab and paste the following content. We just need to replace the value of ‘key-name‘ with the ARN name of our key that we copied in the previous step. It is worth paying attention to whether we have accidentally added any empty characters before or after the name of our key.
{
    "Version": "2012-10-17",
    "Statement": [
        {
            "Effect": "Allow",
            "Action": [
                "ssmmessages:CreateControlChannel",
                "ssmmessages:CreateDataChannel",
                "ssmmessages:OpenControlChannel",
                "ssmmessages:OpenDataChannel"
            ],
            "Resource": "*"
        },
        {
            "Effect": "Allow",
            "Action": [
                "s3:GetEncryptionConfiguration"
            ],
            "Resource": "*"
        },
        {
            "Effect": "Allow",
            "Action": [
                "kms:Decrypt"
            ],
            "Resource": "key-name"
        }
    ]
}
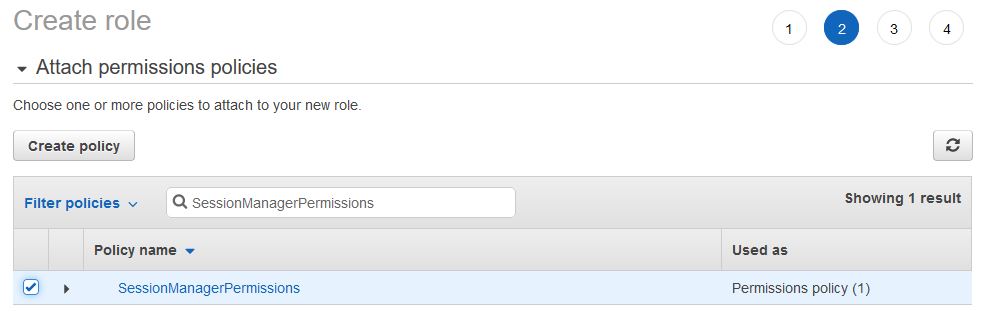
After approval, go to the next window where we enter the name of the policy (I entered “SessionManagerPermissions”) which we are creating and its description without special characters.
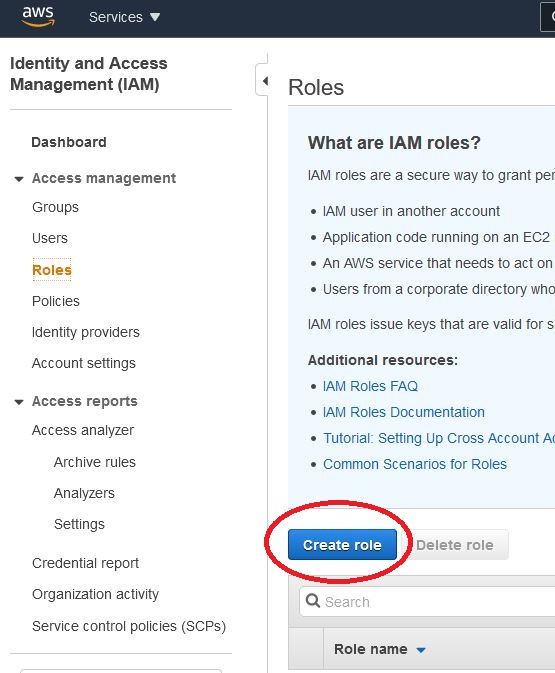
Create Roles
Now we will assign our policy to EC2. Thanks to this, we will be able to select it on any machine and allow connection using the Session Manager. As the policy contained the key, our connection could be encrypted.

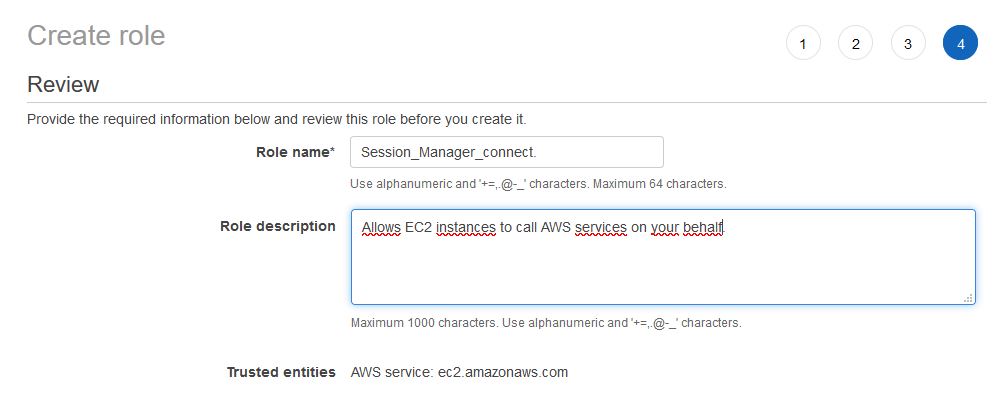
We assign the previously created policy, if we want to assign tags, and in the last window we give the name (I used the name “Session_Manager_connect”) and description.
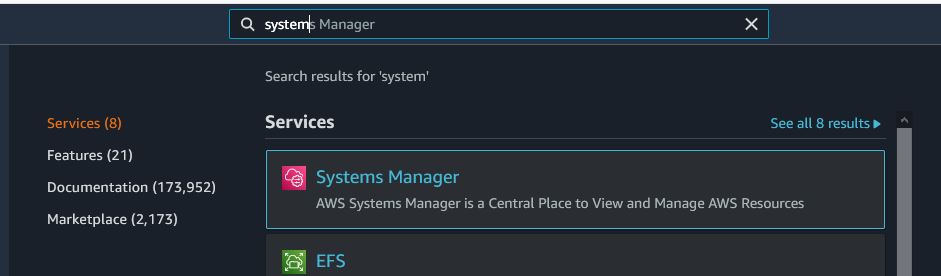
System Manager
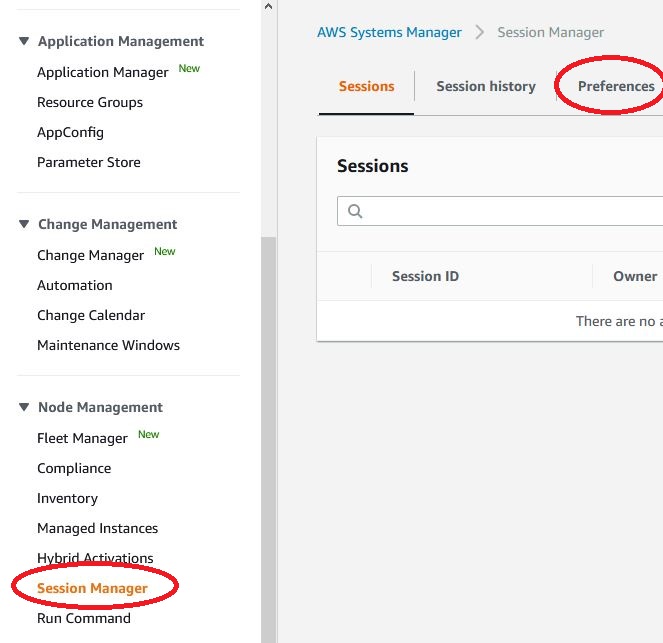
Change System Manager settings. To be able to safely connect to our virtual machines, open System Manager, then open Session manager and select “Preferences”.
We click on EDIT and we can select the option ‘Enable KMS encryption‘ and ‘Select a KMS key‘, now we can select our key from the drop-down menu.
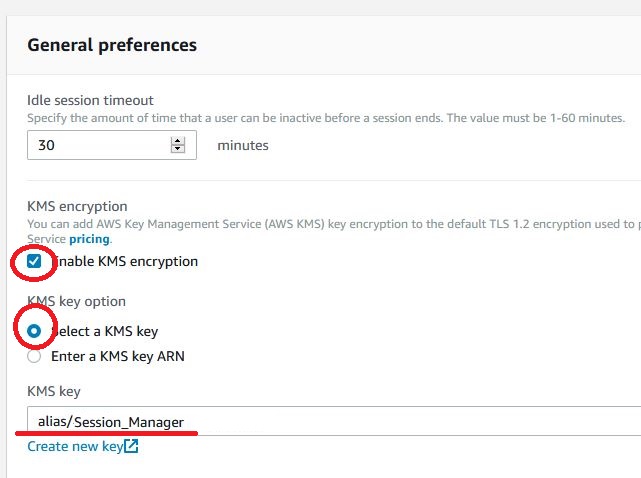
At this point, we can also indicate where the logs from our terminal sessions should be saved if we want.
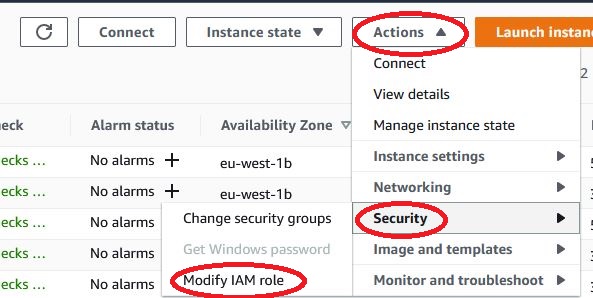
Assign Roles
Now we can assign the previously created IAM role to the machines on which we want to use it. Just open EC2, select one instance, click Actions, Security and select Modify IAM role. From the drop-down list, select our IAM role and confirm.
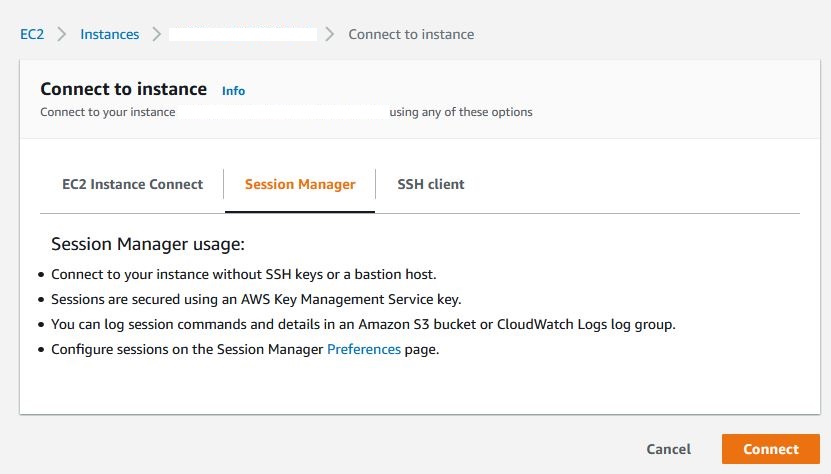
That should be all about it. In newer operating system images, the Session manager service is added automatically. After about 15 minutes, we should be able to connect to the machine using the Session manager. Just open the virtual machine you are interested in, click on connect, select Session Manager and click Connect.

We can also connect not from EC2, but from System Manager. Just open Session Manager, click on Start session and select one machine from the list.

Problems
If it happens that for some reason you still cannot connect, the session-manager service may be a problem with older versions of the system. It is best to log into our virtual machine and check if the service is enabled or installed at all. Below are some commands that will help in diagnosis:
###### Manual installation of Session Manager on Ubuntu Server  14 ######
status amazon-ssm-agent
mkdir /tmp/ssm
cd /tmp/ssm
wget https://s3.eu-west-1.amazonaws.com/amazon-ssm-eu-west-1/latest/debian_amd64/amazon-ssm-agent.deb
sudo dpkg -i amazon-ssm-agent.deb

status amazon-ssm-agent
sudo start amazon-ssm-agent

###### Manual installation of Session Manager on Ubuntu Server  16 ######
sudo systemctl status amazon-ssm-agent
mkdir /tmp/ssm
cd /tmp/ssm
wget https://s3.eu-west-1.amazonaws.com/amazon-ssm-eu-west-1/latest/debian_amd64/amazon-ssm-agent.deb
sudo dpkg -i amazon-ssm-agent.deb

sudo systemctl status amazon-ssm-agent
sudo systemctl enable amazon-ssm-agent


###### Manual installation of Session Manager on Ubuntu Server  20 /18 /16 ######
# install agent by snap
snap install amazon-ssm-agent --classic

systemctl start snap.amazon-ssm-agent.amazon-ssm-agent.service
systemctl status snap.amazon-ssm-agent.amazon-ssm-agent.service
systemctl stop snap.amazon-ssm-agent.amazon-ssm-agent.service

snap list amazon-ssm-agent
There should be only one amazon-ssm-agent service installed on the machine either via dpkg or snap.
If you have connection problems, I also recommend checking the time. During the connection, the signature’s timestamp is checked and compared to the current time, thus limiting the amount of time for which an attack is possible. If the clock differs more than a few minutes, the connection fails.
On ubuntu, you can update the time, for example with:
sudo ntpdate pool.ntp.orgAWS Session Manager logs are usually located on Linux in /var/log/amazon/ssm. On Windows, however, you will usually find them in the %PROGRAMDATA%\Amazon\SSM\Logs directory.
More information can be found in the AWS documentation https://docs.aws.amazon.com/systems-manager/latest/userguide/agent-install-ubuntu.html
This was the first article on AWS Session Manager, I hope you found it useful. I will definitely write more articles related to AWS, and you will find all of them in the AWS category.