An article on how to remove unnecessary resources in Azure subscription. If you also have such a thing that sometimes you quickly create or change resources on the Microsoft Azure platform, sometimes they leave garbage. By “garbage” I mean forgotten drives, IP addresses, or network interfaces that we forgot to delete right away and are lying around unused. Azure Subscription Cleanup can also positively impact our wallet. Nobody likes to pay for something they don’t use.
Today I will show you how you can easily find and clean up such unused resources.
The article is also available as a video with English subtitles on YOUTUBE.
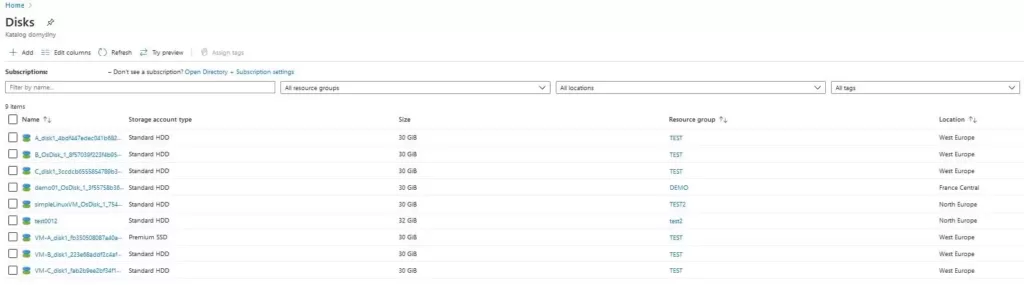
Disks
First, let’s look at disks that are not attached to any machines. This happens, for example, when we replace disks on our virtual machines with others or when we delete entire virtual machines. It happens that the disks that do not have their owners are left then. It is very easy to locate such resources in the Azure portal.
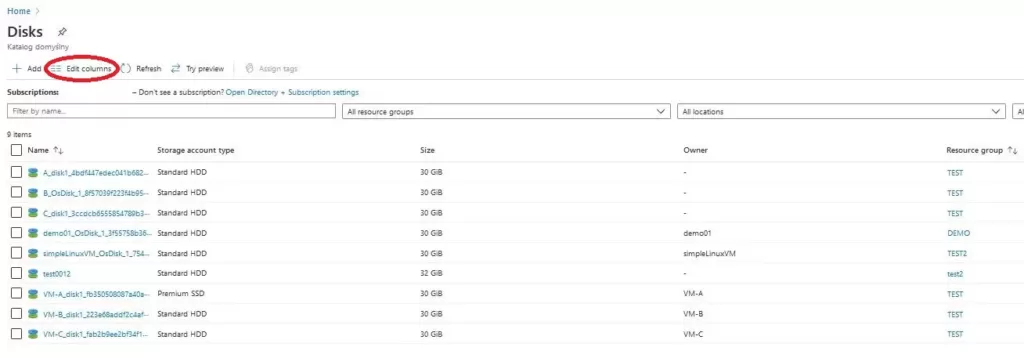
Just open the list of all disks and look at the OWNER column. There should be the name of the machine they are assigned to. If the value is empty it means that the disk is not connected to any machine. I remove such disks.
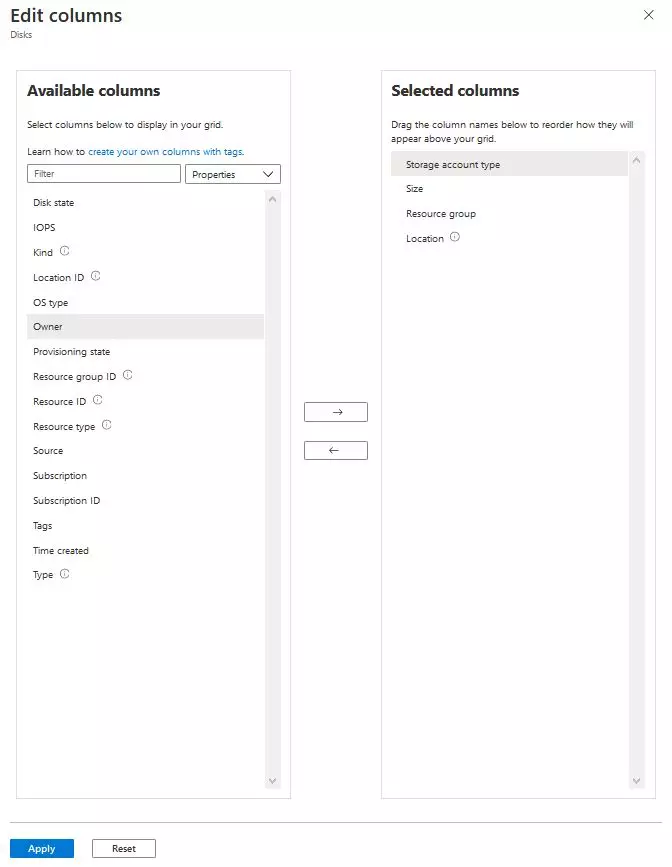
* If you cannot see the OWNER column, click on ‘Edit columns‘. In the new window, select the ‘OWNER’ item and click on the arrow to add this item to the columns on the right. Finally, confirm all apply and a new column will show up.
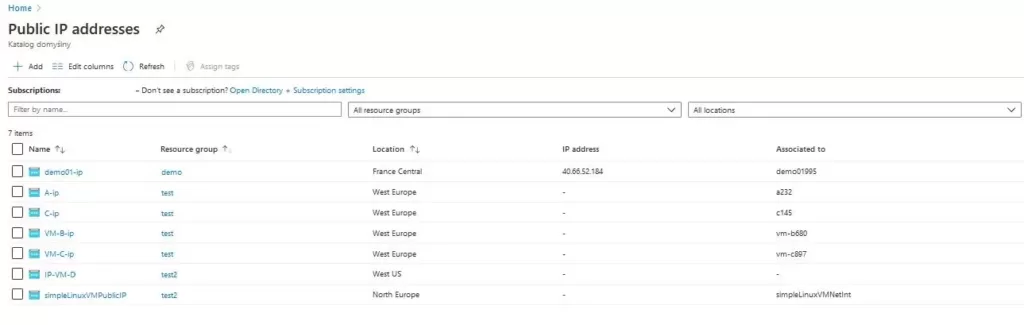
Public IP address
IP addresses are another group of resources that should be cleaned up, because it also generates additional costs. I guess nobody wants to pay for something they don’t use.
Let’s move on to ‘Public IP address‘. Here we are looking for the ‘Associated to‘ column. If you cannot see it, then, as in the previous example with disks, add it using ‘Edit columns’. In this column we can see what resources our public IP addresses are assigned to. If there is no entry, I delete such unused addresses.
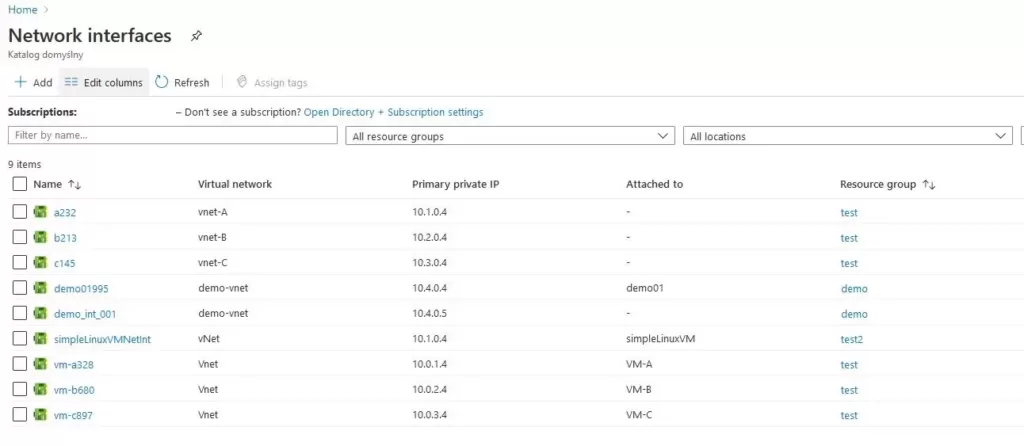
Network interfaces
We find unused network interfaces in a similar way to public IP addresses. We search for ‘Network interfaces’ and also look for the column ‘Associated to’. If you do not see it, then, as in the previous example, add it using ‘Edit columns’.
In this column we can see what resources our network interfaces are assigned to. If there is no entry, I delete such unused network interfaces.
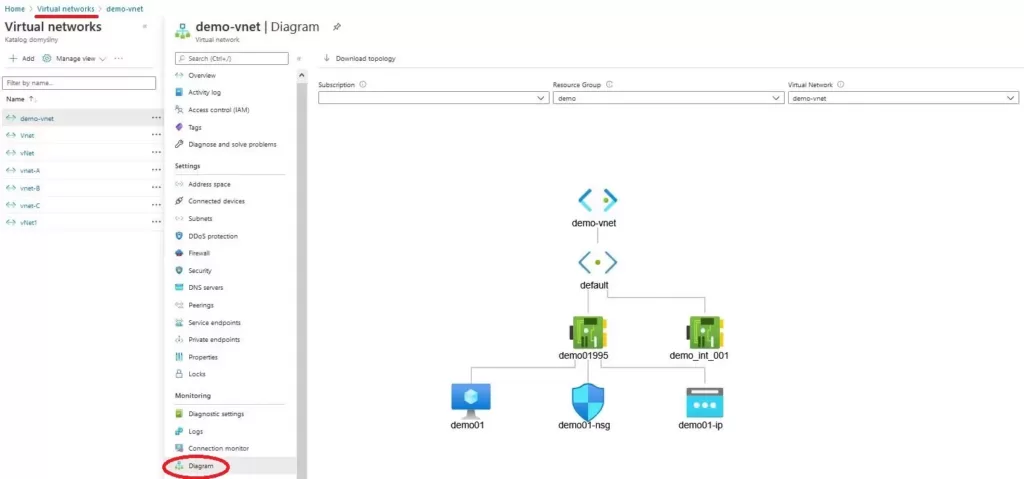
Unused network interfaces can also be located in other more graphical ways. We open any virtual network and select ‘Diagram‘ from the ‘Monitoring‘ option.
Now we can choose the network we are interested in and see what network interfaces are attached to it. It is easy to notice that in the example below, the interface called 'demo_int_001' has no resources attached, so you know what you can do with it;)
Removal of the entire environment
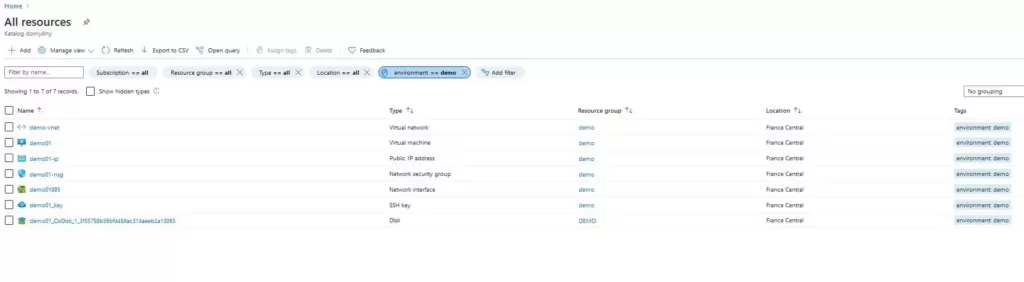
If we use TAGs, it is easy to remove entire environments scattered over various resource groups. Cleaning up an Azure subscription in this way is only recommended if you are careful to always assign the correct TAGs.
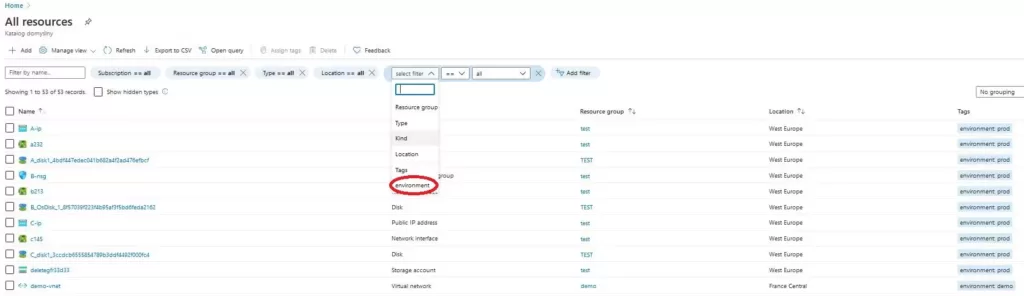
We click on all resources.
Now click on ‘Add filter‘. To display resources only from a specific environment, we choose the name of the tag that we created when creating resources and the value that interests us. In my case it is environment and demo value.
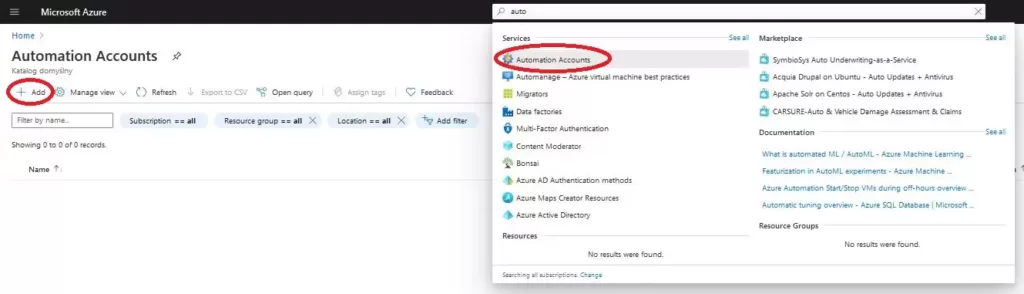
Automatic resource cleanup in Azure with an Automation account
If we want the demo environment to be removed every day, at the end of the day, it is best to add a script that will guard it. If we sometimes create different things for testing/ demonstration and we are afraid that we will forget to delete them after the presentation/ tests and it will cost us dearly. Automatic resource cleanup in Azure with an Automation account is a good way to make sure your resources are cleanup when you’re done. In the example below, I will show you how to add such a script to the Automation account.
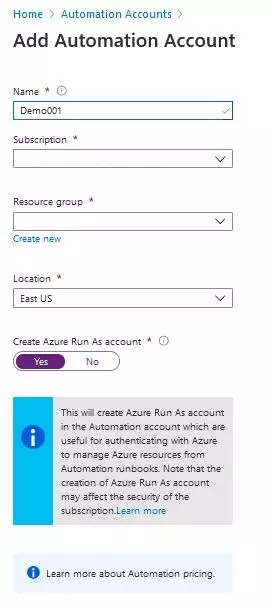
If we do not, we create Automation Account. In the new window, enter the name, select a subscription, create or select a resource group, location and it is very important that the 'Create Azure Run As account' option is selected. Now we can click on Create.
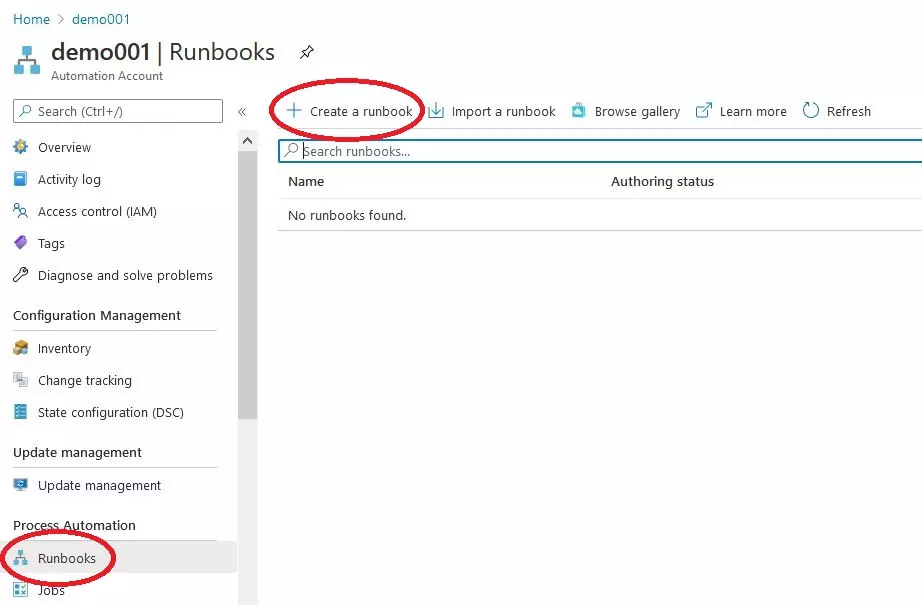
When we have created 'Automation Account' we open it. With 'Process Automation' select 'Runbooks' and the 'Create Runbook' plus. Now we can paste our script and adapt it to our needs.
PowerShell script 1
Script number 1 first lists all resources with the specified tag (environment = test) and then deletes them. One has to be very careful not to make a mistake.
$DeleteResources = Get-AzureRmResource -TagName environment -TagValue test
$DeleteResources

foreach ($resource in $DeleteResources) {
    Remove-AzResource -ResourceId $resource.id -Force -WhatIf
}
The script includes the -WhatIf option which will not remove resources, but will only show what happens when we execute the command.
!!! After removing the -WhatIf option, resources will be irretrievably deleted !!!
PowerShell script 2
Script number 2 clears the entire ‘resource group’, it just removes everything on it. At the beginning, it lists all resources that are included in the indicated resource group (test). In the second part, it executes a delete command for each resource.
$DeleteResources = Get-AzureRmResource -ResourceGroupName test
$DeleteResources

foreach ($resource in $DeleteResources) {
    Remove-AzResource -ResourceId $resource.id -Force -WhatIf
}
The script includes the -WhatIf option which will not remove resources, but will only show what happens when we execute the command.
!!! After removing the -WhatIf option, resources will be irretrievably deleted !!!
Scheduling cleaning
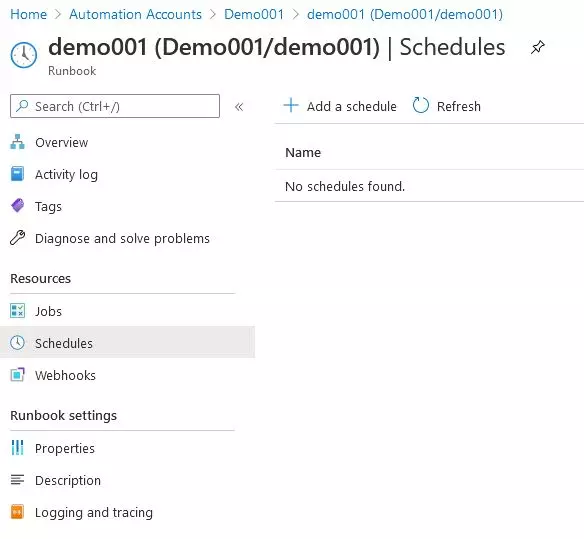
When we added our script to the ‘Runbook’ and ran it manually, checking if it works, we still need to schedule its run. For this purpose, in our runbook, click on ‘Schedules‘ and select ‘Add a schedule‘.
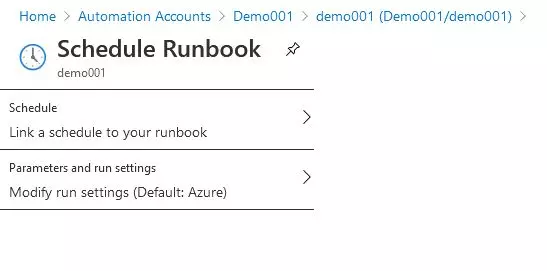
Then, in the new window, select ‘Schedule‘ and ‘Create a new schedule‘.
In the new window, we enter the name, description, date and time of the first execution of the task. Pay attention if the time zone is set correctly and check the ‘Recurring‘ option. There will be new options from which we choose how often the task is to be repeated, starting from the date and time we have set. I chose to execute the script once a day at 5:00 PM.
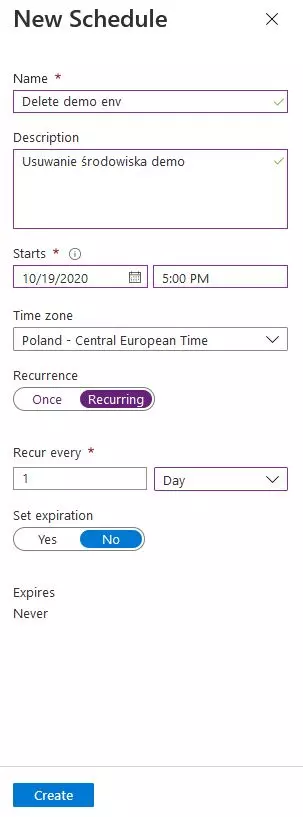
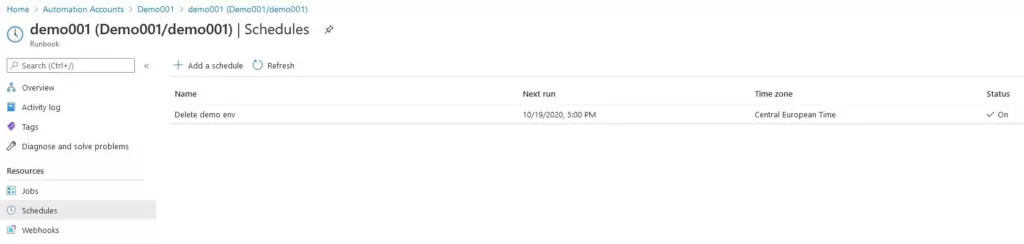
When everything is set, click on ‘create‘. As in my case, you should see the most important information, that is: name, time zone, information when the task will be performed again, and whether it is active or not.
Lock
One more tip at the end how to protect yourself against accidental deletion of resources. You can use something like LOCK. We can set up a security for a specific resource or a whole group of resources.
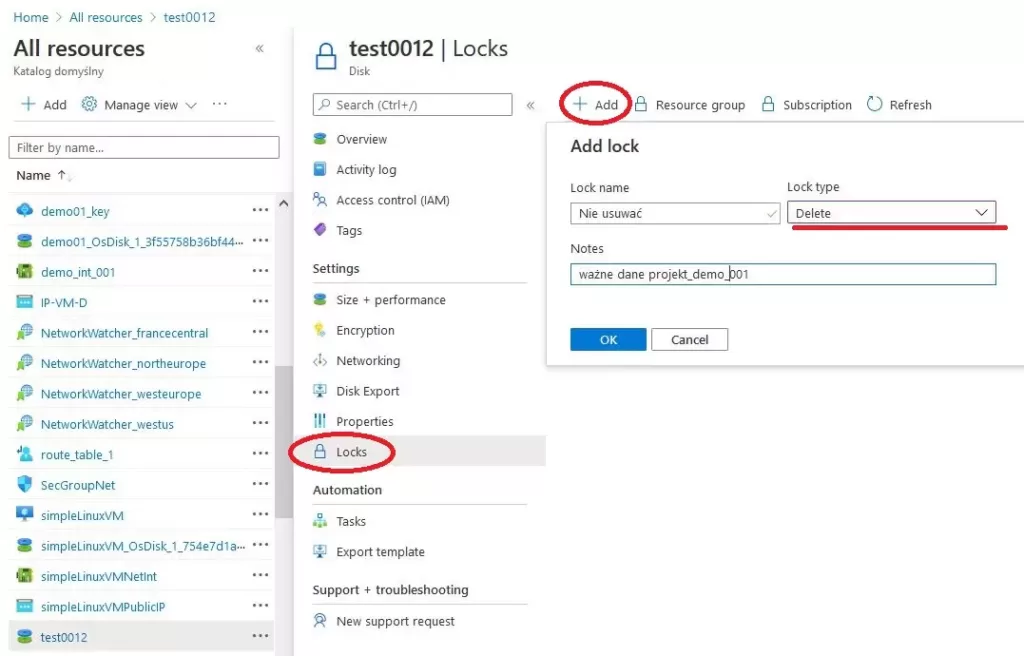
To remove an asset with such protection, you will need to release the protection first, and then you will be able to remove the asset.
You can read more about LOCK protection in the Microsoft documentation at https://docs.microsoft.com/pl-pl/azure/azure-resource-manager/management/lock-resources.
If you liked the post about cleanup Azure subscription, you can find other Azure related articles in the azure category.