Have you ever considered running your own AI server from the comfort of your home? With tools like Ollama, it’s easier than you think. You don’t need to be an expert to make it happen, and the best part? It’s completely secure because everything runs locally on your hardware, not in the cloud. This guide walks you through the process step-by-step, showing you how to install and set up your own private AI server using a regular laptop.
Whether you’re using Windows, Linux, or macOS, this guide will work for you. Let’s dive in!
Why Use a Local AI Server?
Running AI models locally has several benefits:
- Data Privacy – All data processing occurs on your device, ensuring sensitive information never leaves your control.
- Offline Accessibility – AI models can function without an internet connection, making them ideal for remote or offline environments.
- Cost Efficiency – Avoid cloud service fees for compute resources, as everything runs on your hardware.
- Customization – You can fine-tune models to meet specific needs or preferences without external restrictions.
- Learning Opportunity – Setting up and running local AI models deepens your technical knowledge and provides hands-on experience.
Step 1: Installing Ollama
Ollama is a lightweight application that enables you to run AI models locally.
- Visit ollama.com and download the installer for your operating system.
- Follow the on-screen instructions for a quick and easy installation.
Step 2: Adding Your First AI Model
To get started, let’s add the Llama 3.2 model.
- Visit ollama.com/library to browse available models.
- Select a model that suits your needs. For this guide, I’ve chosen llama3.2:3B, a lightweight 2GB model perfect for general tasks. Just copy the installation command and paste it into your terminal:
ollama run llama3.2:3b- Wait for the download to complete.

Now, you’re ready to start asking questions in terminal.
Step 3: Adding a Graphical Interface
Using a terminal might feel limiting, so let’s enhance your setup with OpenWebUI, a user-friendly graphical interface.
Step 3.1: Install Docker
Docker simplifies running applications like OpenWebUI.
- Download Docker Desktop from docker.com, and follow the installation steps
- Launch Docker Desktop to ensure it’s running correctly.
Step 3.2: Install OpenWebUI
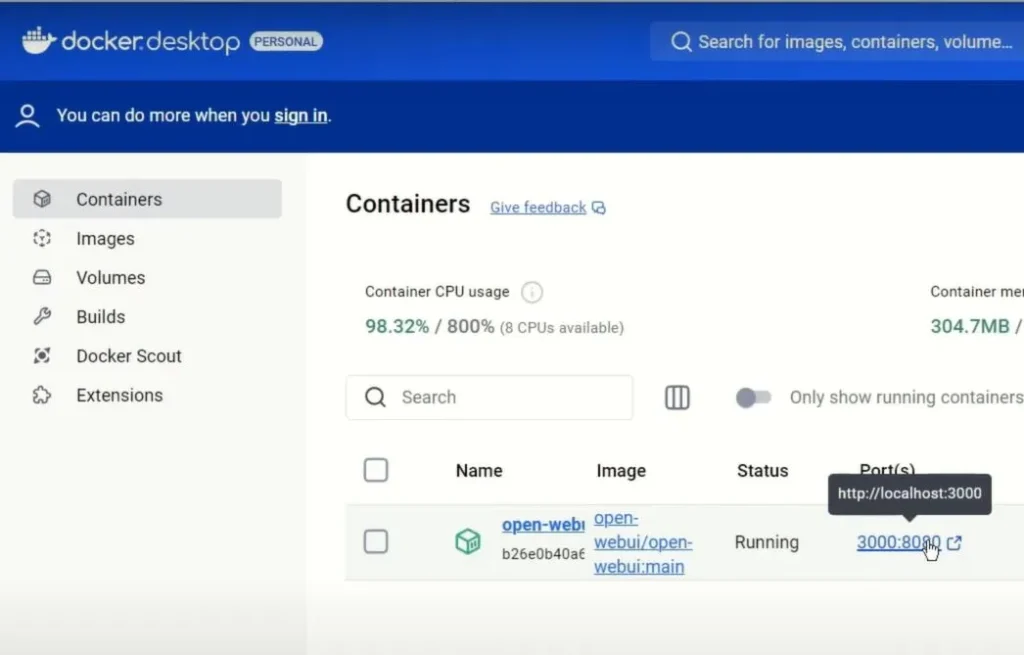
- Visit docs.openwebui.com and follow the installation instructions. Just copy the command and paste it into the terminal to set up OpenWebUI.

- Open Docker Desktop to see your running container.

- Access the interface by visiting
localhost:3000in your browser.
Create an account, and you’re ready to explore!
Exploring AI Capabilities
With your AI server up and running, the possibilities are endless. Here are some practical examples:
- Summarization: Ask your AI to summarize an article.
Summarize the following article: [Paste content here]- Code Optimization: Request improvements to your code.
Optimize this code: [Paste code here]- Language Learning: Translate sentences or get grammar explanations.
Translate this sentence into Spanish and explain the grammar.- Creative Writing: Generate stories or dialogues in multiple languages.
Write a funny dialogue between a cat and a robot. Adding Advanced Models
Want more power? Install advanced models directly from the admin panel in OpenWebUI.
Navigate to Settings > Models and browse through the available options.
- Add larger models like qwen2.5-coder:14B for advanced tasks like generating Python code:

Select a new model from the dashboard menu and test it, for example:
Write Python code to simulate rolling dice.- Add a model designed for image analysis such as llama3.2-vision:11b:

Now upload a picture and ask questions like:
Does anyone in this picture wear glasses? Conclusion
Congratulations! You’ve set up a private AI server that’s secure and full of potential. From answering complex questions to assisting with programming, your AI server is now a powerful tool at your fingertips.
If you found this guide helpful, be sure to like the video and subscribe to my channel for more tutorials.
